
Welcome to your Packtive @ Home experience!
So you got our greeting card from beautiful South America and responded to our call. Let yourself be taken on a little trip. And off you go!
Before you start – Felix wants to welcome you to your selfguided workshop. 🙂


At Packtive, we want to sweeten your everyday life. What would be better than a trip to the chocolate world? Let yourself be taken to the packtive chocolate workshop @home!
You will produce your own chocolate today – from the beginning. You start roasting the cocoa bean and end up tasting your homemade chocolate. Meanwhile, you will enjoy other by-products of the valuable bean.
The best thing about it: You will not only make the chocolate, you will also learn a lot of interesting facts about the sacred black and white bar. In the following you will find all the information you need to make it. For this you will be carried out step by step. So what are you waiting for?
Your Matchplan
In the package you will find almost all the utensils you need today:
- Fine organic criollo cocoa beans*
- Organic cocoa butter*
- Mortar & pestle
- Chocolate molds**
- Milk powder (vegan coconut milk powder)
- Chef hats
- Gift packet
- Tea bags and toppings
In addition, you only need;
- An oven or an ordinary pan
- A whisk or somethin similars as a simple spoon
- 20-50g sugar, we recommend powdered sugar
- About 100ml milk per person
- A bowl or something similar to melt the chocolate over a double boiler
The workshop takes around 3-4 hours.
* Do you have questions about nutritional values, sehlf life or origin? You can find more information right here.
**Please clean before first use.
Overview
Let's have fun!
Now choose a moderator who will guide you through the steps and make the workshop lively. He has to bring the black gold to life!
But first: put on you chef hats 🙂
And you’re ready to go…
How about a small group photo at this point? You are very welcome to share this on Instagram. You can of course find more impressions on our profile – find the link in the icon.

The cocoa bean
Look for the most important ingredient of today – the cocoa bean. Carefully open the bag with the beans. Doesn’t it smell fantastic already?
The beans are removed from the cocoa pod, fermented and finally dried in the sun for about one week. In doing so, they can be stored and lose their bitter substances. Exactly like this, we sent them to you. These are Criollo cocoa beans, the findest cocoa variety, which only accounts for around 3% of the world’s harvest.
The roast
Now you have to roast the beans. Roasting causes the beans to lose water and allow them to develop the aroma that we all love so much. You can use the oven (recommended) or an ordinary pan for this.
IMPORTANT: If you are doing this package alone, please reduce the amount of beans by one half! Otherwise it will take too long to break, peel and pestle the beans.
In the oven:
This is the more relaxed and safer way. With preheated 130-150° top/bottom heat you can roast the cocoa beans for about 15-25 minutes, depending on how intense the result should be. Please turn around the beans in the oven about 1-2 times.
The beans are ready when an intense cocoa scent spreads and the pods come off easily. The inside of the bean crumbles quite easily.
In the pan:
The beans are roasted without fat for about 5-10 minutes over low to medium heat. Make sure to stir them continuously (!) with a wooden spoon so that they don’t burn.
The beans are ready when an intense cocoa scent spreads and the pods come off easily. The inside of the bean crumbles quite easily.
Chocolate quiz for the wait
Until the cocoa beans are ready and have cooled down a bit, we have brought a little quiz to test your knowledge of cocoa. Have fun!
What's next?
Breaking and Peeling
After the beans have cooled down a bit, you need a little tactfulness. You can easily crack the cocoa beans with the supplied mortar and then unwind the shells. The more carefully you do this, the more chocolate will come out in the end.
Please do not throw the shells away! We still need this for our first cocoa product – right now!
the first by-product

Té de cacao
Take two to three teaspoons of the cocoa shell and pour hot water over them. If you need them, we have given you eco tea bag. Let it steep for about 3-5 minutes. Upgrade the whole thing depending on your taste, e.g. with a little honey, sugar, cinnamon or vanilla. The tea made from cocoa pods is incredibly beneficial. The herbal ingredients in the peel are said to be good for the heart, kidneys and nervous system.
You can store the shells in a dry place for up to 24 months.
Enjoy and relax!
already trained today?
you need motivation?
Play this song and pestle with the rythm!!
The mortar
We hope you have recovered a little with a cozy cup of tea. Now the strenuous part beging. Or did you think making chocolate is like children playing? You should plan around 30-45 minutes for this.
IMPORTANT: If you’re doing this alone – start with an electric mixer. Do the detail-work with the mortar. Trust us – we have gone through this 🙂 If you have no electric mixer, please reduce the beans!
Now grab the inside of the cocoa beans, also called cocoa nibs and the mortar. Orientate yourself for the next steps on the pictres in the slider.
- Put all the nibs in the mortar at the same time (full to the brim). So first mash the nibs very carefully with the pestle. As a first result, these are becoming smaller and more compact.
- Gradually, the mass initially becomes „sand-like“ and as soon as the valuable oils emerge, it begins to shine more and more.
- Take turns so that you don’t run out of strength.
- The end is in sight when your fingers get a little dirty and the chocolate starts to melt on your skin.
- At the end, keep you speed high. With the heat created by rubbing, the mass turns into a mushy pulp.
You will surely curse us after some time, but every bite of chocolate is worth it. The longer you grind, the finer the chocolate becomes at the end. If you stop too early, your chocolate will be very granular.
Homemade just tastes best! When you are ready or have run out of strength and leisure, it’s time for the next strengthening.

the second by-product

Xocolatl
Probably the oldest cocoa drink in the world originated in Central and South America about 3500 years ago. The Mayas and Aztecs mixed cocoa with warm water and various spices such as chili, pepper or vanilla. This sacred drink was very precious and was reserved only for nobles, clergymen and warriors from important battles.
Warriors! Now take some of your cocoa mass after the mortar battle and mix yourself a xocolatl. Half a teaspoon is enough for a small cup. However, we recommend doing it like the Spaniards, who first did it at the royal court in the 16th century. They prepared it with hot milk and honey and thus paved the way to today’s cocoa. Some chili should not be missing.
Tip: The moistest part at the bottom of the mortar is best suited. But lumps don’t matter either.
The last steps

The melting
You have now had the exhausting part behind you. Now take about a quarter of the amount of cocoa butter in the package and melt it over a water bath. Small iron bowls are very suitable for this.
Start by melting the cocoa butter. It sets approximately the right temperature (38-45°). Hot tap water is usually enough here. If you melt the chocolate too hot, it can get a little granular. So take some time here and make sure that no water is added.
Gradually add the mortared cocoa. Mix the whole thing until the consistency becomes creamy and is easy to stir. If necessary, you can also gradually add some cocoa butter. We need the more cocoa butter later. Once you have created the basis, you can now work your way through the two basic variants one after the other. About 4 bars of chocolate are created from this mass.
You don’t need much for the classic dark bar. Add some powdered sugar (20-50g) depending on your taste and stir everything until the chocolate shines smoothly. Depending on how much sugar you add, you can give in additional cocoa butter to achieve a creamy consistency. If you are not a fan of bitter chocolate, just skip this variant.
You’re done? Now pour off a dark chocolate. Off in the shape with it!
For the popular variant milk chocolate, you build on the rustic dark variant. After pouring a dark chocolate, you now need the whole milk powder and some cocoa butter in addition to the sugar. Add about 30g of milk powder to the chocolate mass and gradually add some cocoa butter again until you have just reached a creamy consistency. We still need the remaining whole milk powder later. Are you ready? Let’s put it into the silicon shape.

Off into the form
When the chocolate mass is ready, you can pour it into the molds and gently squeeze your favorite ingredients into it. For example, a wooden skewer or similar is very suitable for this. Pay attention to how deep you push the ingredients into it if you don’t want the image on the front to be affected.
We have added a few sample ingredients to you in the bags. What is your favorite chocolate?
Now let the chocolates cool in the refrigerator for at least 15 minutes. Since you need the molds more often, you can speed it up through the freezer. Since the chocolate melts relatively quickly later, we recommend storing it in the refrigerator. We are fans of little garbage. So why not use the packaging of cocoa butter for the chocolates?
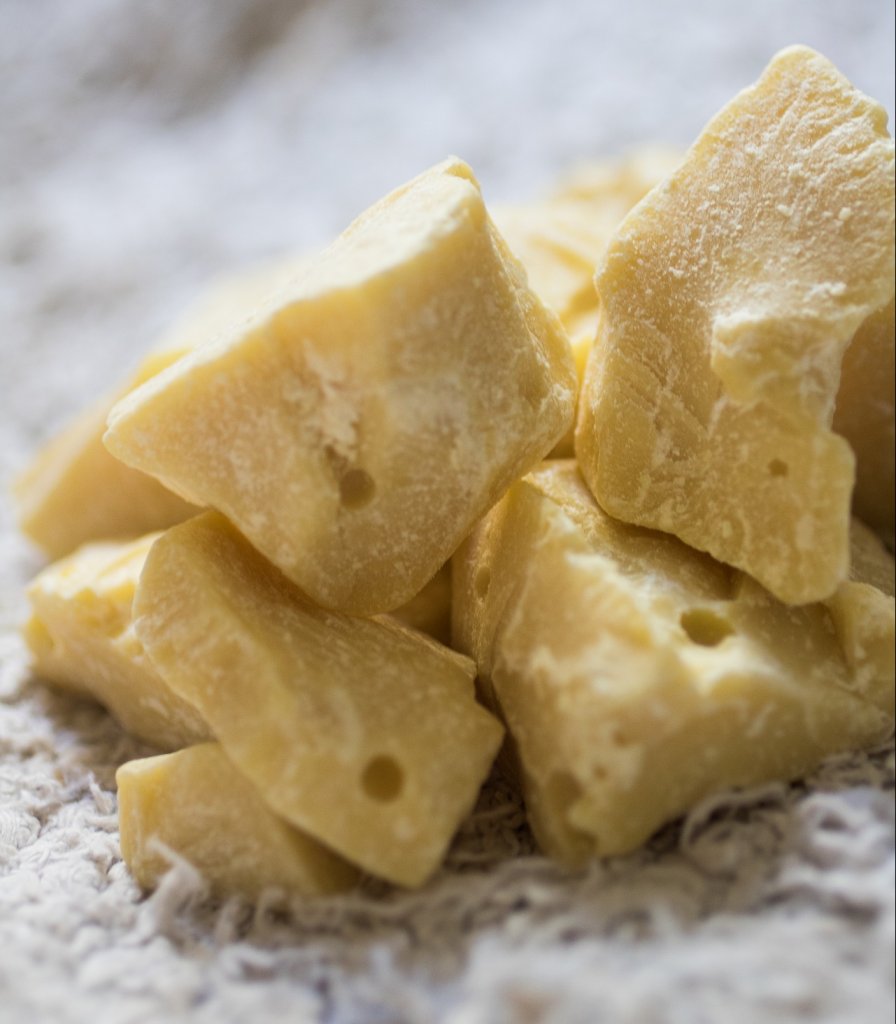
The white chocolate
While the dark plates in the refrigerator cool down, we finally devote ourselves to the white bars. In the white bar we only use the cocoa butter. This is pressed from the roasted cocoa bean and filtered. Similar to how you have done so far. In the EU, at least 20% cocoa butter and 14% dried milk must be processed in a white bar. Unfortunately, this is often stretched with sugar and cheaper fats such as palm oil. Not so with us! We will only produce the chocolate with cocoa butter, whole milk powder and sugar (60%, 30%, 10%).
Now take the remaining cocoa butter (about 60g) and melt it in a bowl over a water bath until it is liquid. Add the whole milk powder (about 30g) while stiring constantly. Depending on your taste, you still need between 5-15 gr. sugar. Stir the whole thing until everything has dissolved well. The mass is probably very liquid now, but don’t worry, it will quickly solidify again in the refrigerator. The mass is enough for about 2 white bars. The dark bars should now be hard enough. Pour the white chocolate back into the molds and decorate it as you like with the ingredients you add.
Our favorite is white chocolate with chopped coffee beans. And yours?
Off to the refrigerator for min. 15 minutes!
Greeting from south america
In case you want to share your homemade chocolate with your loved ones, we have given you small gift packages. This allows you to send the greetings from South America safely. Simply fold, chocolate in and loop around.
You did it!
We hope you had a nice time with us at the cocoa plantation. Thank you for you visit!
Kind regards,
your Packtive Team
Did you enjoy it? Is there anything you did not like? We are looking forward to hear from you!
If you liked it, have a look at our other experiences package for home!
But please tell us before you order we need to translate it! 🙂